Help:Tutorial - Image Editing 1
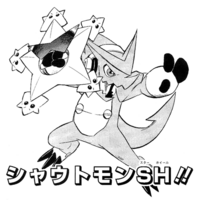
Today, you get to learn how to edit a clean digimon picture out of a manga scan.
|
Tools[edit]
- Manga scan
- Image editing program
- The power of rock
Tutorial[edit]
Step 1 - Choosing Your Image[edit]
|
|
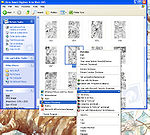
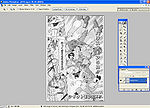
For the most part, you want a nice, clear image of the digimon with as little covering it as possible, otherwise you will have to do some redrawing, which we will leave for another time. For this tutorial, I chose page 18 of Digimon Xros Wars - Chapter 05 in order to get a picture of Shoutmon SH. Go ahead and open it up in whatever image editing program you prefer; I am currently using Photoshop 7.0 (as that is the only version that can run on my computer without it having a nervous breakdown). Gimp should also work. Sai Painter is good for redrawing crisp lines, but does not have the leveling function we need.
Step 2 - Crop[edit]
|
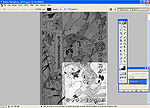
Okay, so you have your image file. If we were working on a more complicated image, I would suggest duplicating the layer, but that isn't necessary at the moment. For now, just zoom in. As you can see, the image is pretty gritty, and a lot bigger than we need. Choose your crop tool and select around the portion you actually want. Make sure to leave a good amount of room around the furthest points you want. We can adjust the size once we're done.
Step 3 - Level[edit]
|
|
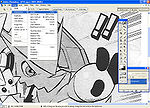
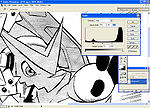
As I said in the last step, the image is pretty gritty. As it's a black and white image, we want "pure" white and black to work with. Go to Image > Adjustments > Levels to bring up the leveling tool. Also, I suggest zooming in nice and close so you can tell the colors easier (especially if your monitor hates you).
Now, there are three toggles you can move to adjust the levels. The far right one, when moved left, increase the amount of white in the image, and the one on the left, when pulled right, adjust the amount of black in it. The one in the middle is for finer adjustments, but for this image I didn't particularly need it. Just pull them in until most of the grain is gone from the image and the blacks look solid.
Note: The more white you adjust, the more screentones used in the artwork tend to degrade. Sometimes you just need to find a good balance to preserve most of the toning while cleaning up the image.
Step 4 - Cleaning/Erasing[edit]

|
|
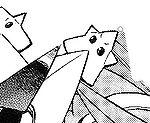
Now the major part. Select your eraser tool, a medium-large size brush and get to work. Make sure to use one with a solid edge, not a fuzzy one. I like to use a larger brush and get rid of most of the background around an image first, then go back in with a smaller brush for the details closer to the character I want. This is a lot easier and faster if you are using a Tablet.
Sometimes you might want to go into the image itself and erase any "spots" you see in the image. Quite often there are little ink splatters from the printing process, especially if the scan is from a magazine rather than a bound book.
For the moment, I am leaving the text in, as erasing it would require redrawing, which will be covered later.
Step 5 - Resizing[edit]
|
|
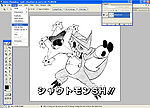
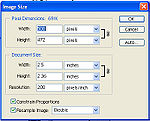
Okay, so you're done cleaning up your image. Now it's time to size it down for use. Most digimon images used on Wikimon are resized to 320 x 320, so at the very least, we want to get somewhere around there (rather than the roughly 1000 x 900 dimensions the image is currently at). Along with keeping the file size manageable, shrinking the artwork usually hides minor imperfections, making it look nicer in general. Go to Image > Image Size to do the adjustments. Here, we're going to cut down the dimensions by about half to start off with.
|
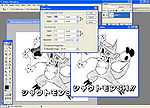
Now, you can see that the image isn't perfectly square, but it easily could be. So, copy and paste the image into a new document, whose dimensions I cut down to 460 x 460 to have an even number. Originally I had made the document a little too small, so I increased the canvas to its current size and centered the image.
Note: Make sure to save your file before you size it down. You don't know if you might need the larger original later.
Step 6 - Save![edit]
Now it's time to save the results of your boredom/hard work! For most B/W images, I like to save as a PNG, as it doesn't leave the artifacts and grain that saving as a JPEG usually does.